Creating Animated Textures
There are several methods to create animated textures in Source 2. We will follow the standard workflow, using the official tools for the creation of animated textures.
Firstly, there are two types of animated textures:
- The animated texture that loops non-stop.
- The animated texture that only executes a sequence (commonly used in particles).
.mks file creation
We create a .mks file. This file must follow the format below:
C-style comments are supported. Block comments are not!
// This is a comment ✅ Correct
/* This is a comment */ ❌ Fails to compile
The frame KeyValue is a path to an image file, after always termine the line with and extra 1, for example:
frame grain_frame_00_color.tga 1
The images you use (so the compiler can generate an atlas) are highly recommended to be in a resolution that is a power of two (2^n) or divisible by two.
This way the generated atlas is more likely to be filled efficiently (less wasted space).
The number of frames should also be a power of two or divisible by two.
The compiler by default will generate the best resolution for the altas, many times you will enconter an error saying that the compiler could not find what resolution suits the best for the altas, in that case try:
- Use power of two textures or divisible by two.
- Use a lower resolution (Instead of 1024x1024 use 512x512).
- Lower the number of frames used in the animated texture (So the compiler can generate fit all the images inside the altas).
sequence 0
loop   // Remove this if your animated texture doesn’t need to loop.

frame "frame1" 1
frame "frame2" 1
frame "frame3" 1
    .
    .
    .
frame "frameN" 1
The .mks format also supports multiple sequences. For example:
sequence 0
frame "s1frame1" 1
frame "s1frame2" 1
frame "s1frame3" 1
    .
    .
    .
frame "s1frameN" 1

sequence 1
frame "s2frame1" 1
frame "s2frame2" 1
frame "s2frame3" 1
    .
    .
    .
frame "s2frameN" 1

.
.
.

sequence N
frame "sNframe1" 1
frame "sNframe2" 1
frame "sNframe3" 1
    .
    .
    .
frame "sNframeN" 1
Once you have created your .mks file, it will tell the compiler how to create the atlas for your animated texture.
After defining the animated texture, we need to compile it so it can be used in particles or materials. There are different workflows depending on the case.
Creating an animated texture for particles (.vtex)
Let’s start with particles:
Particles usually don’t use materials. They use textures. For that, we need to create a texture by making a .vtex file.
In the "m_fileName" "string" KeyValue2, you must type the relative path of your .mks file.
Example:
"m_fileName" "string" "materials/particles/screenoverlay/film_grain_001/film_grain_001_animated.mks"
Here is a complete example of how your .vtex file should look:
<!-- dmx encoding keyvalues2_noids 4 format vtex 1 -->
"CDmeVtex"
{
	"m_inputTextureArray" "element_array"
	[
		"CDmeInputTexture"
		{
			"m_name" "string" "InputTexture0"
			"m_fileName" "string" "materials/particles/screenoverlay/film_grain_001/film_grain_001_animated.mks" // Replace this string with your relative path to the .mks file.
			"m_colorSpace" "string" "srgb"
			"m_typeString" "string" "2D"
			"m_imageProcessorArray" "element_array"
			[
				"CDmeImageProcessor"
				{
					"m_algorithm" "string" "None"
					"m_stringArg" "string" ""
					"m_vFloat4Arg" "vector4" "0 0 0 0"
				}
			]
		}
	]
	"m_outputTypeString" "string" "2D"
	"m_outputFormat" "string" "RGBA8888"
	"m_outputClearColor" "vector4" "0 0 0 0"
	"m_nOutputMinDimension" "int" "0"
	"m_nOutputMaxDimension" "int" "0"
	"m_textureOutputChannelArray" "element_array"
    [
		"CDmeTextureOutputChannel"
		{
			"m_inputTextureArray" "string_array" [ "InputTexture0" ]
			"m_srcChannels" "string" "rgba"
			"m_dstChannels" "string" "rgba"
			"m_mipAlgorithm" "CDmeImageProcessor"
			{
				"m_algorithm" "string" "Box"
				"m_stringArg" "string" ""
				"m_vFloat4Arg" "vector4" "0 0 0 0"
			}
			"m_outputColorSpace" "string" "srgb"
		}
	]

    "m_vClamp" "vector3" "0 0 0"
    "m_bNoLod" "bool" "0"
}
You can change the compression format of the compiled texture! (Very useful when dealing with pure/strong colors)
Go to the "m_outputFormat" "string" "CompressionFormat" KeyValue2 and type your desired compression format.
Example: "m_outputFormat" "string" "RGBA8888"
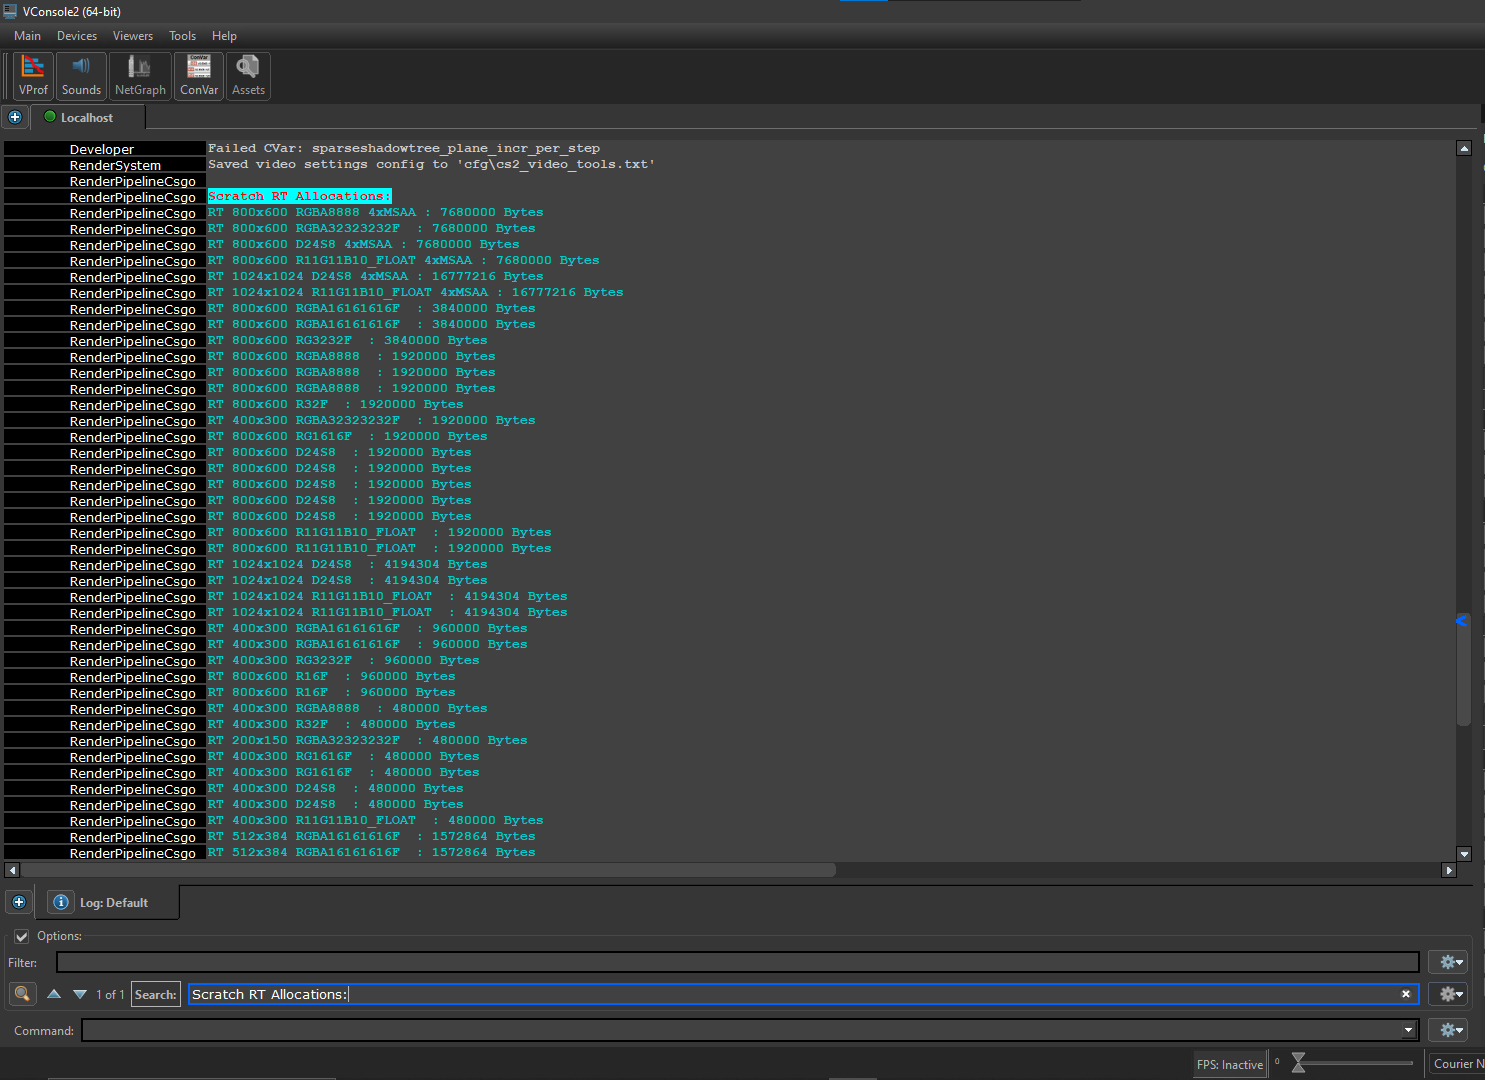
To know what compression formats Source 2 supports, start the game, open vconsole2.exe, and search for Scratch RT Allocations:


The compression format is shown with an orange underline.
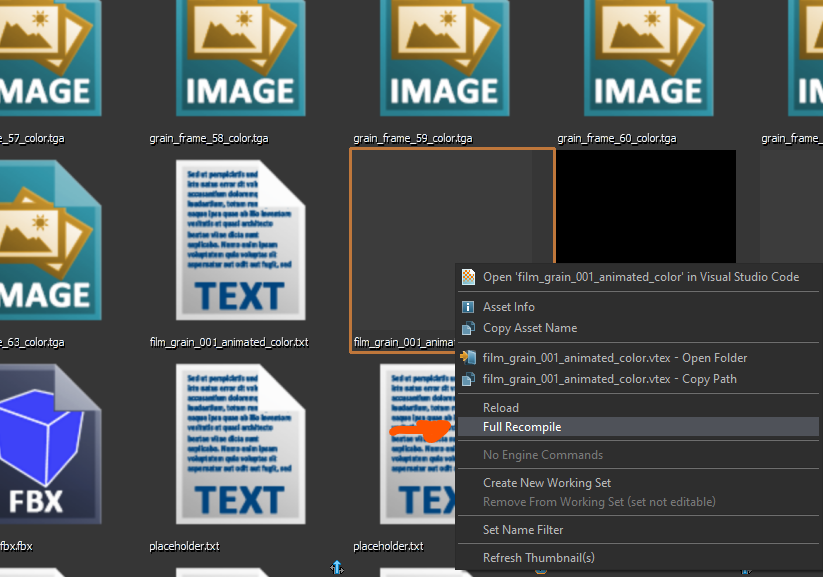
Once the .vtex file is configured, you need to compile it. Usually this happens when you first load the tools if everything is set up correctly. If it doesn’t appear, open the asset browser, right-click, and select Full Recompile.
Many times when compiling the .vtex or .vmat file you may make mistakes in the .mks.
The error shown in vconsole2.exe is often unclear. Run resourcecompiler.exe to get the full error output.
vconsole2.exe error:

resourcecompiler.exe (full) error:


Now your texture is ready to use for particles!
Creating an animated material
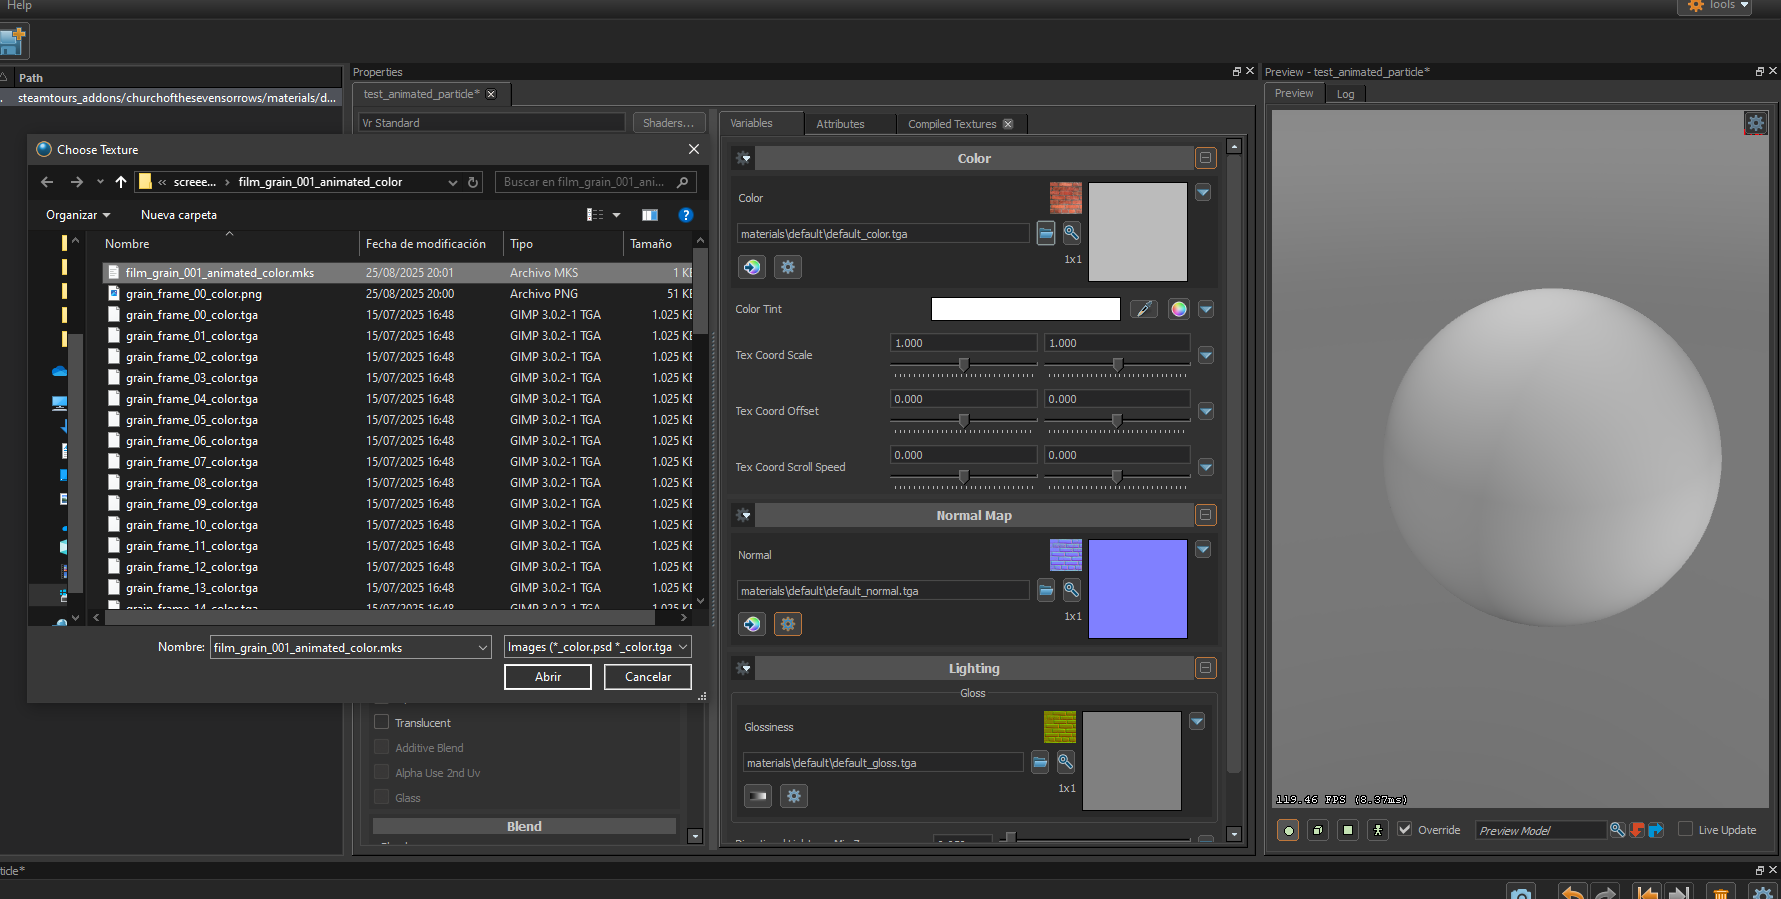
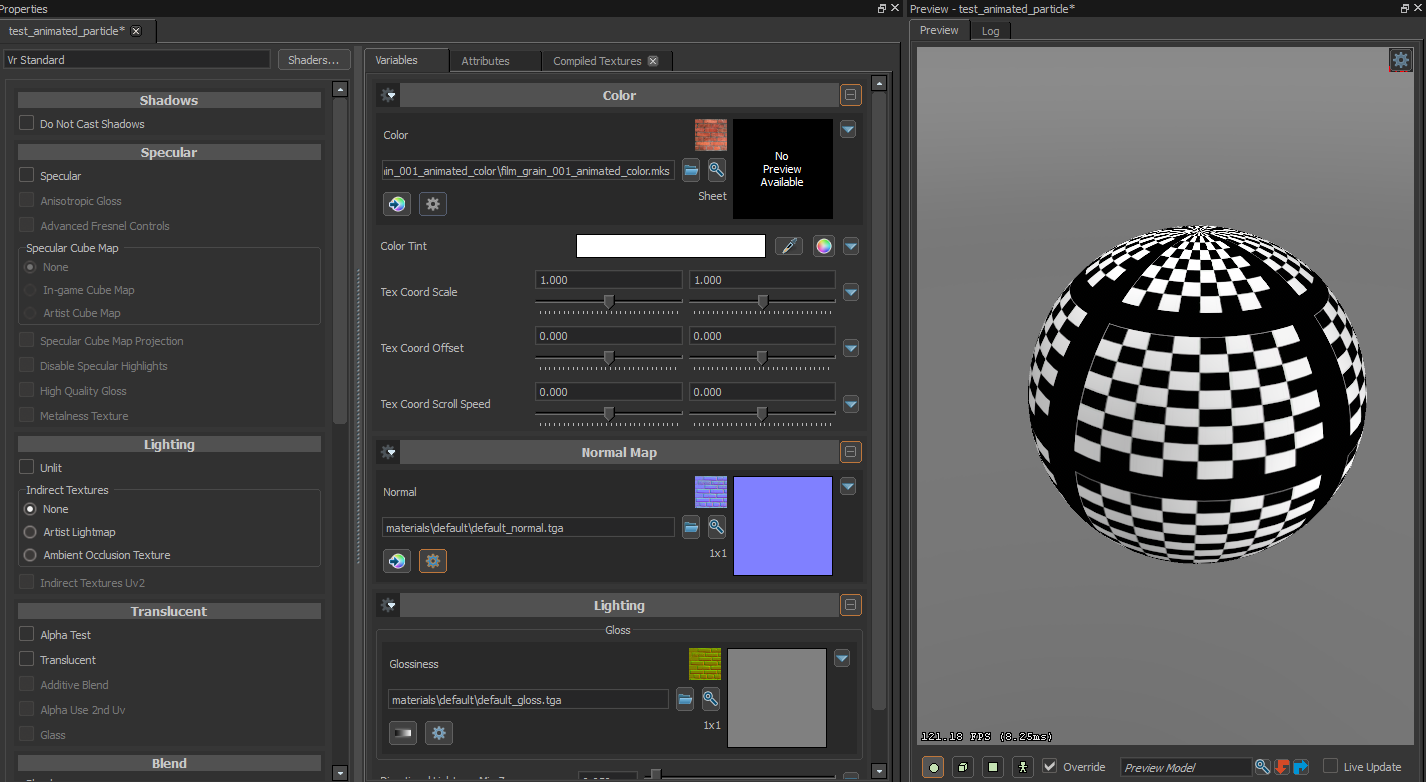
For materials the process is very similar, in the Material editor, create a new material, open the dialog to import a texture and select the .mks file.


Animation modes
In some games like ![]() Counter-Strike 2 and
Counter-Strike 2 and ![]() Half-Life: Alyx the
Half-Life: Alyx the Complex material shader supports multiple animation modes, as seen below:
Make sure the "Texture Animation" checkbox is checked as in the image! Afterwards, settings related to animation will appear in the "Texture Animation" section.
Sequential
Sequential will go frame by frame in respect to the "Animation time per frame" setting.
Random
Random will pick a random frame in respect to the "Animation time per frame" setting.
Scripted
Scripted will use the "Animation Frame" setting to set the animation frame, you can add a Dynamic Expression to this parameter, and drive it trough render attributes.