How to export blender geometry to Source 2.
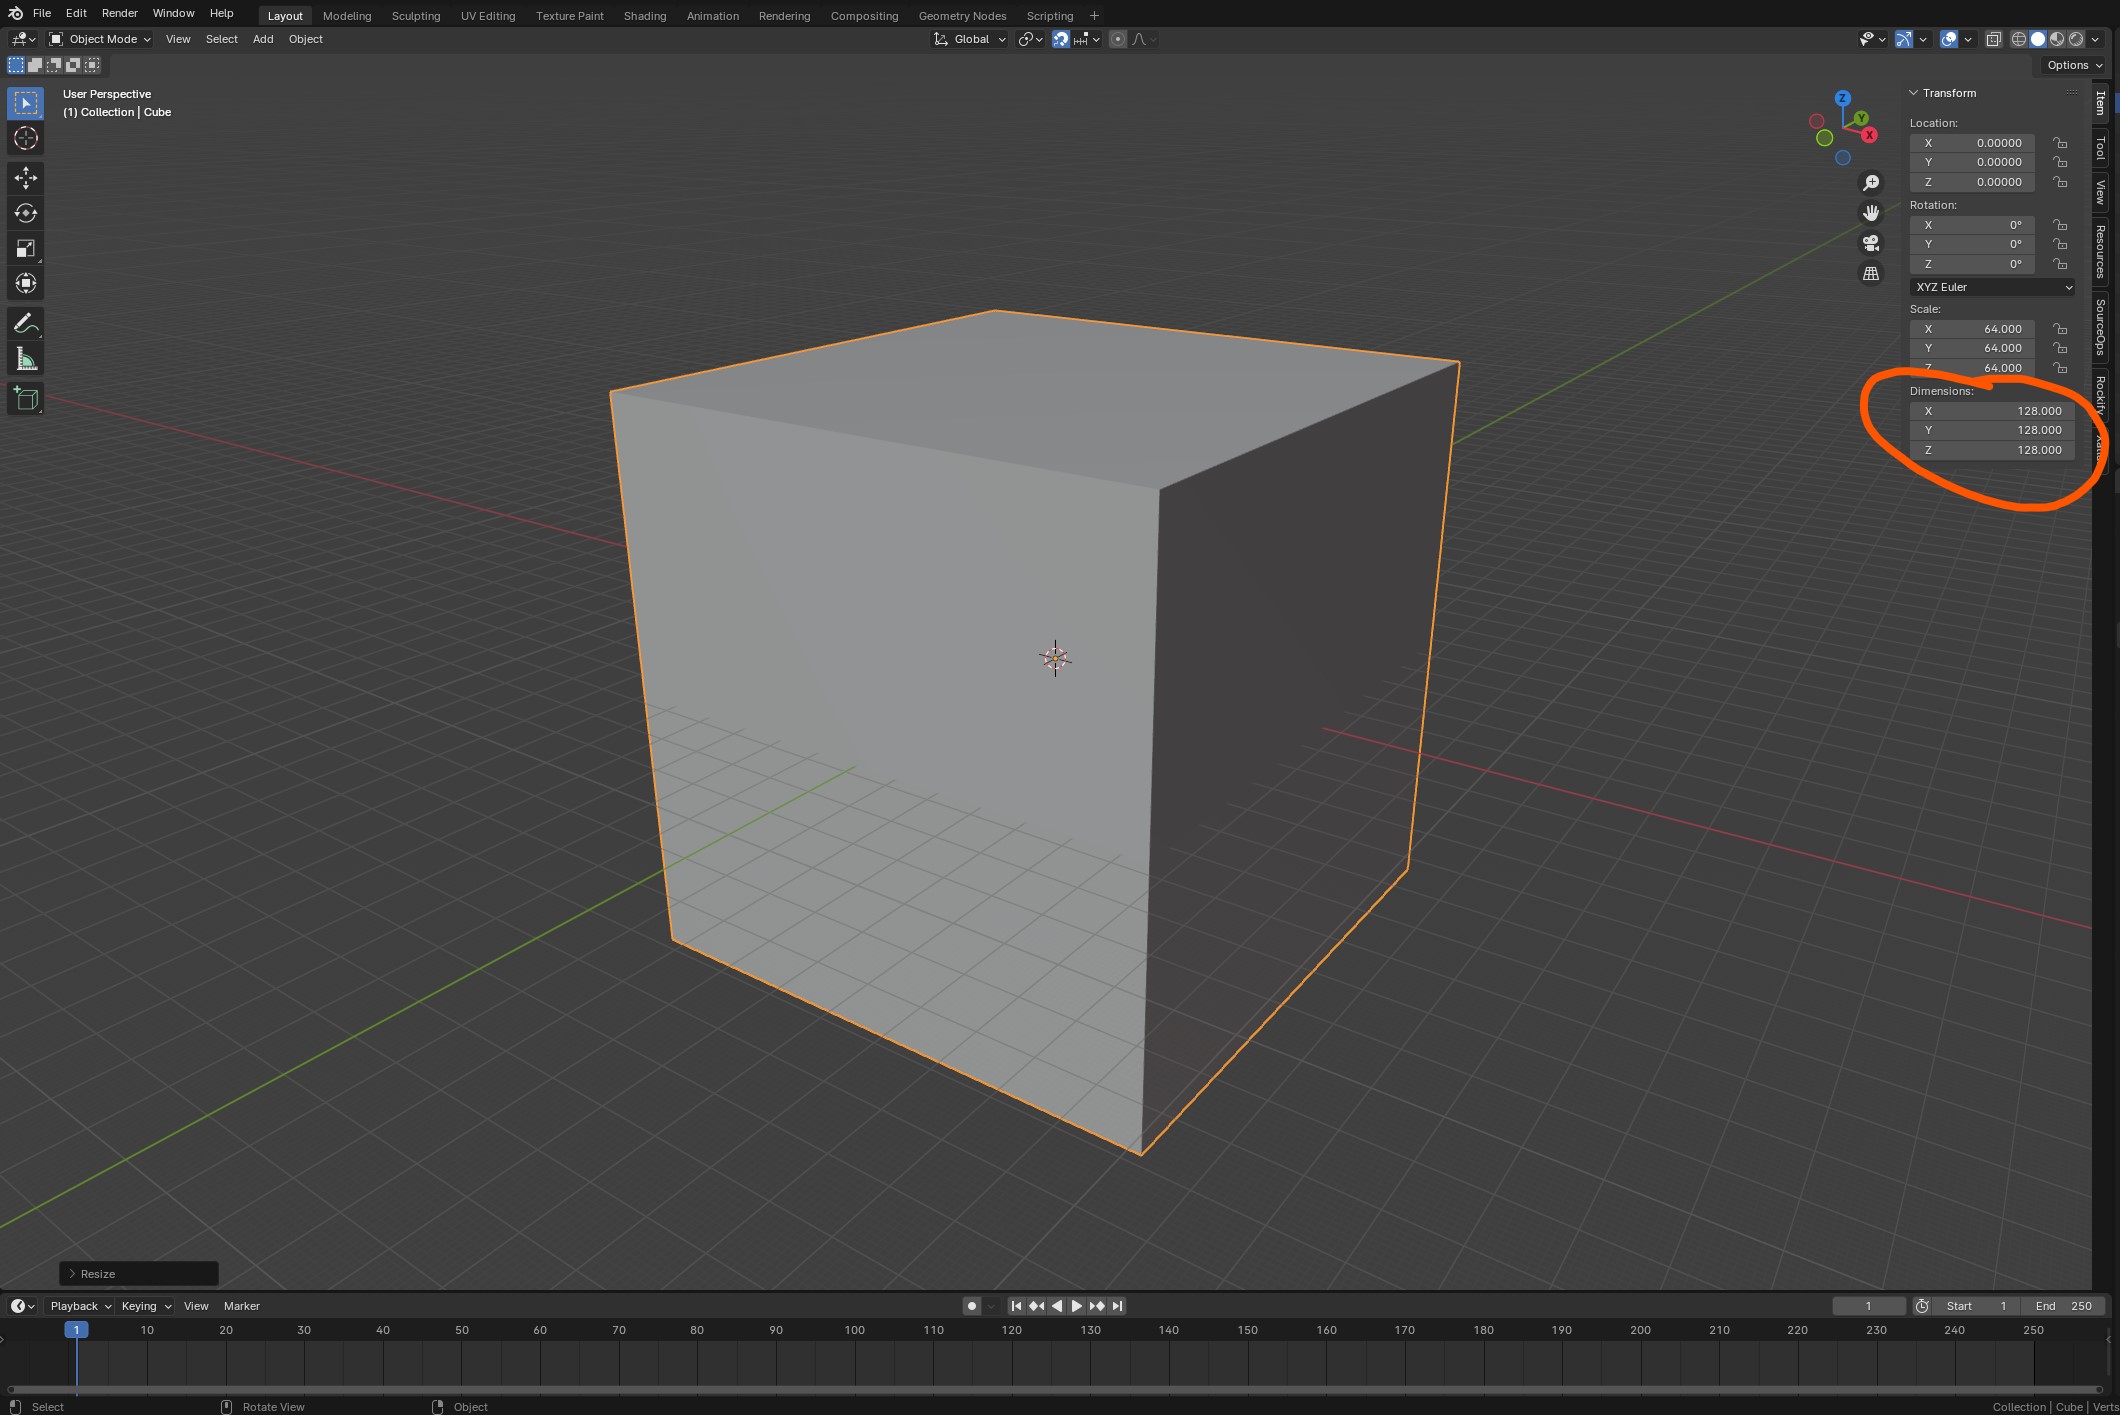
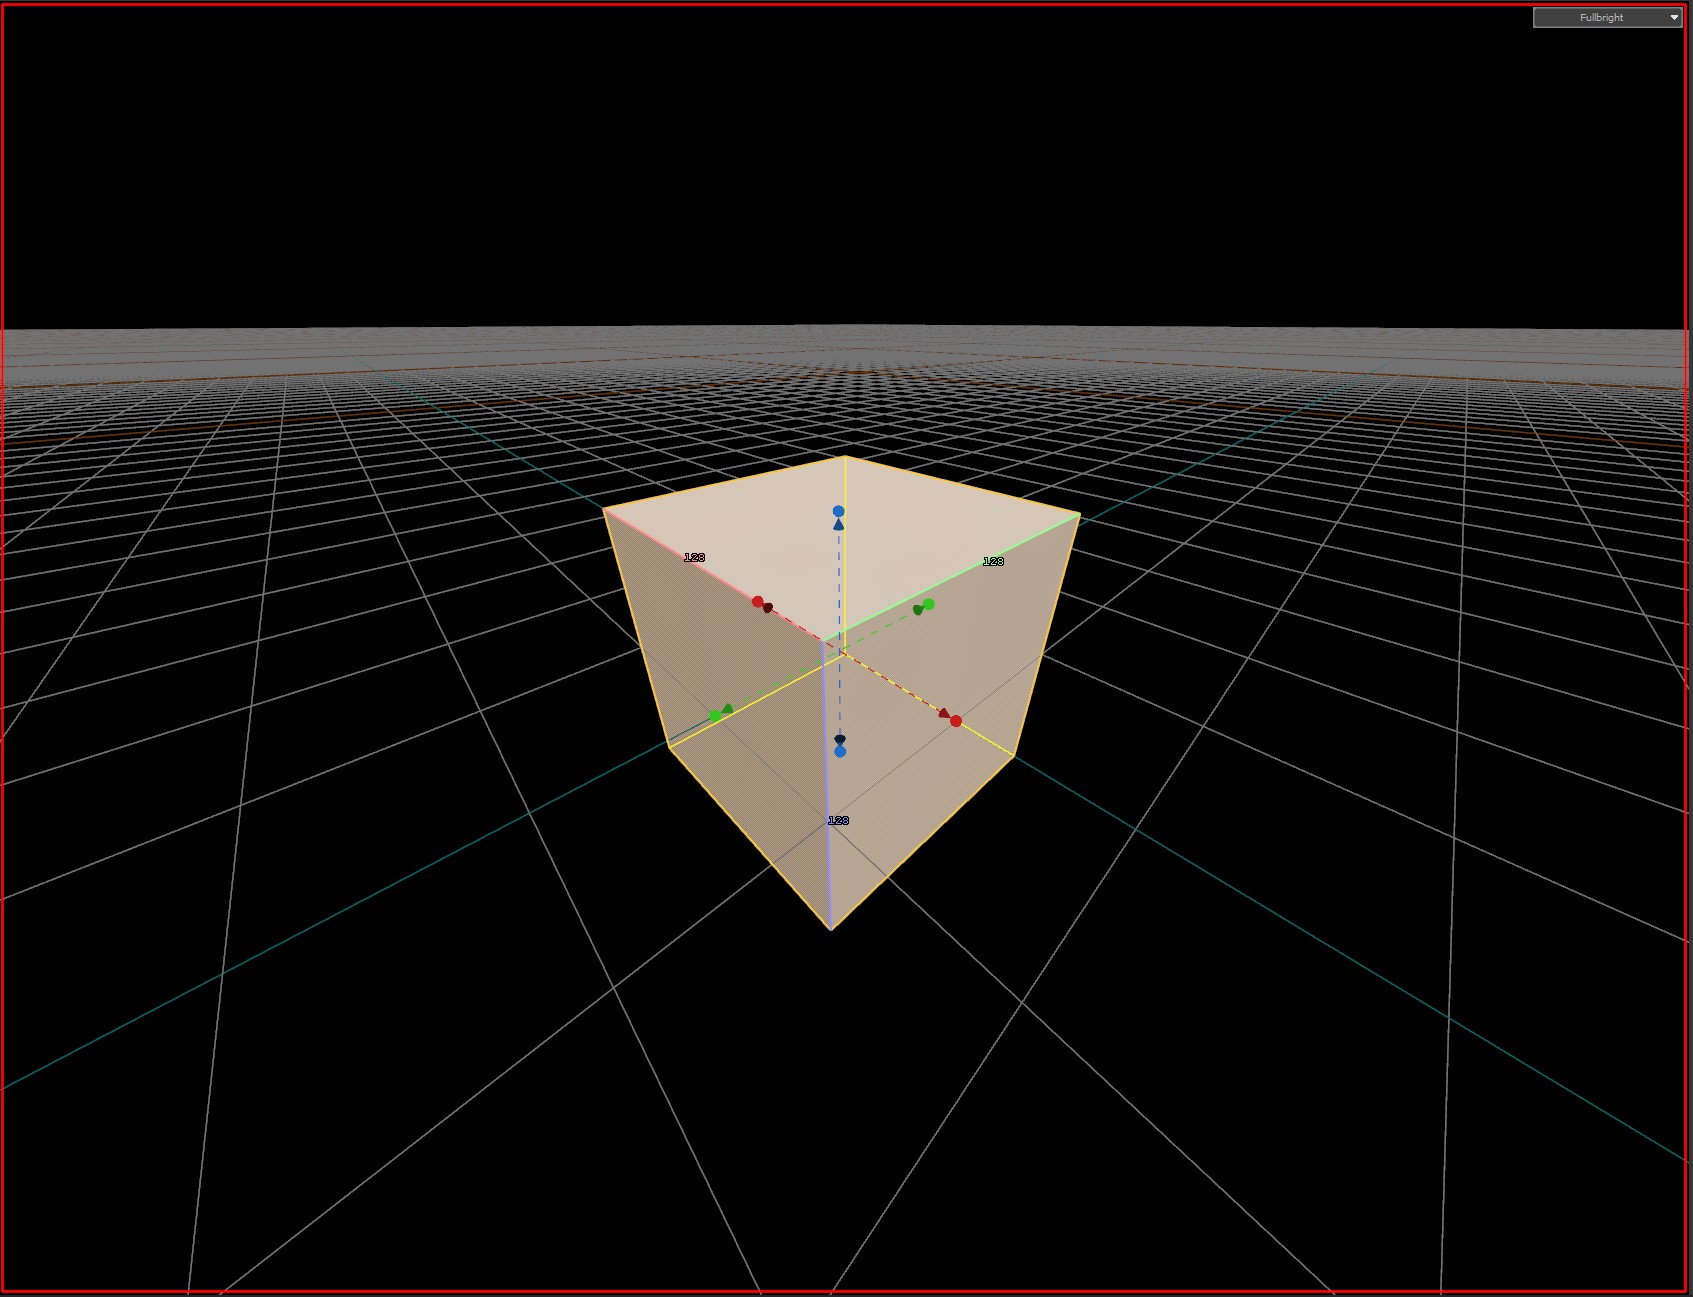
This guide explains how to to export blender geometry to Source 2 in 1:1 scale.
We will use .fbx files for the tutorial. It is highly recomended to avoid .obj files, becouse there are many missing features or lack of standarization. For more information see the dropdown table.Comparison
.fbx vs .obj formatsFeature .OBJ.FBXUnit Scale Metadata None — units are raw numbers Yes — stores real-world unit scale (cm, m, inch) Coordinate System (Y-up/Z-up) Not stored — importer guesses Explicitly stored in metadata Transform / Pivot / Hierarchy Lost — everything baked into world space Fully preserved (object transforms, pivots, hierarchy) Smoothing Groups / Normals Basic support — often recalculated Accurate per-vertex normals and tangents Animation Support None Full support (skeletons, keyframes, cameras, lights, etc.) Reliability Across Software Prone to scaling/orientation issues (inconsistent between tools) Consistent and predictable results
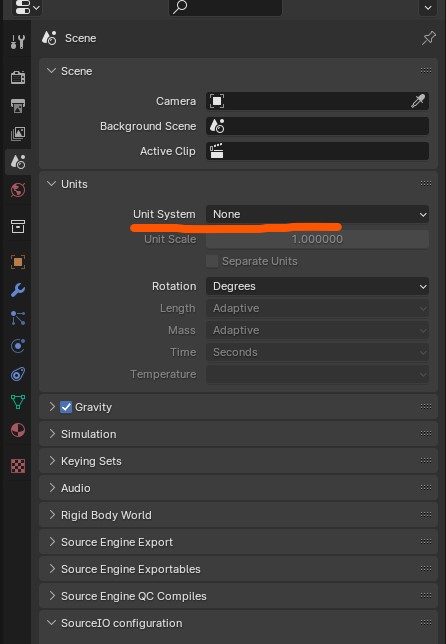
It is highly recommended to set your scene units to None. When exporting meshes to advanced formats such as .fbx, .glb, or .gltf, these file types often include metadata containing the scene’s unit scale. Different software handle this differently — for example, Maya
uses the metric system by default, while Adobe Substance 3D Designer defaults to the imperial system.
To avoid scaling inconsistencies when re-exporting your models later for Source 2 or other engines, it’s best to set your scene units to None. This ensures a consistent, unitless scale across all tools in your personal or team pipeline.
Exporting the blender scene
- Set the blender units to
None
- Export your blender scene in
.fbx
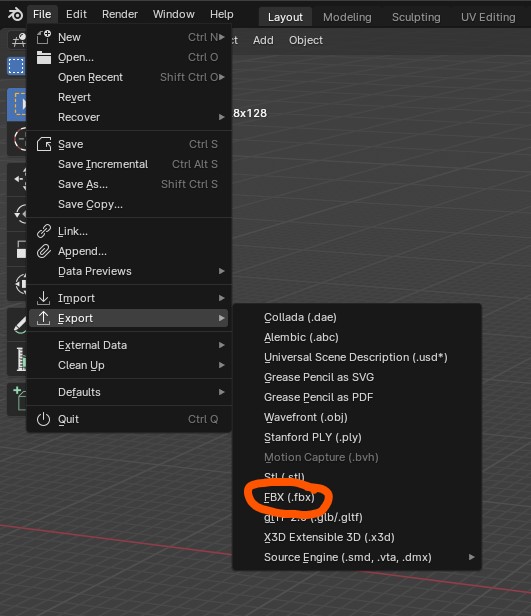
- Enter the fbx export panel and set the export scale to 0.01
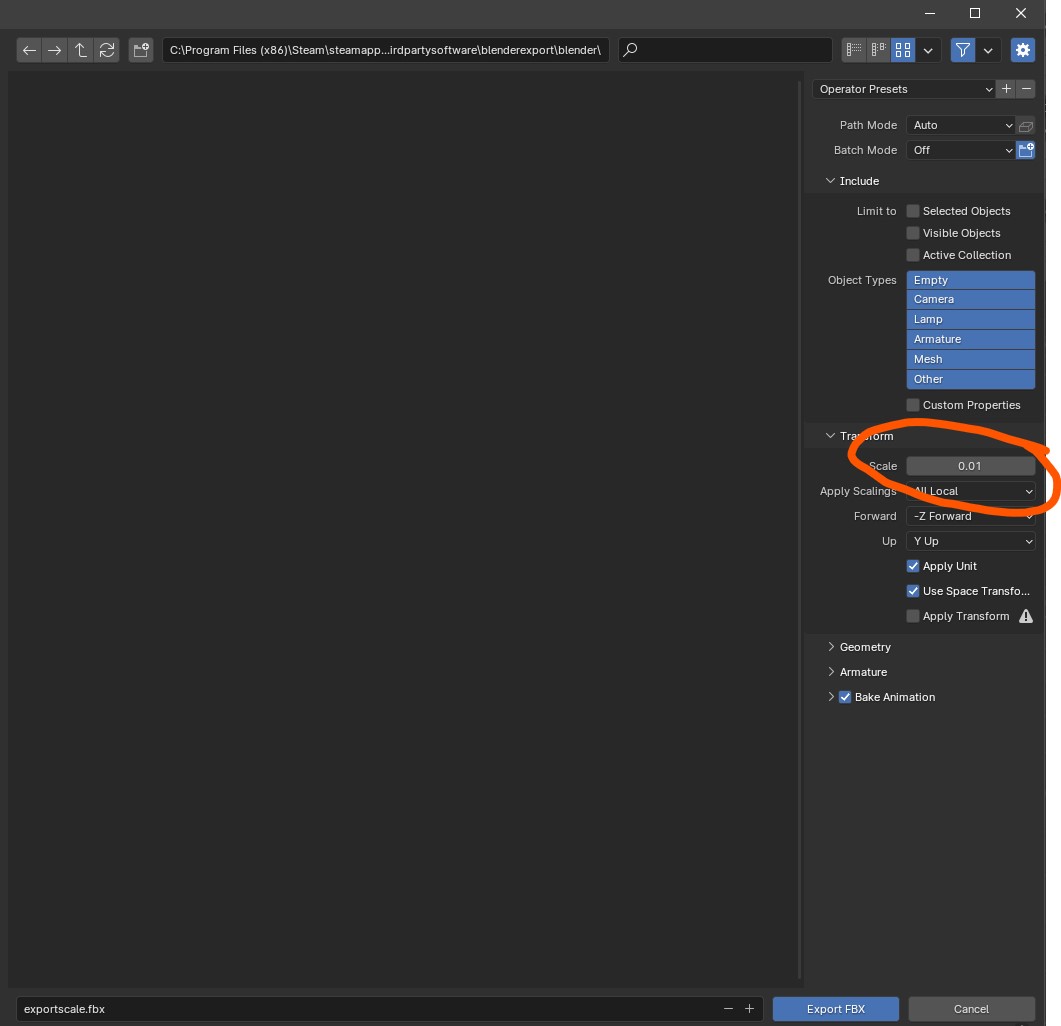
Now your mesh will be ready to use in the Source 2 workflow. You can import yout mesh into Modeldoc or Hammer.
Results
